At last my first Bolt Action battle report.
My worthy opponent, Dave, has finally finished basing his Chindit Force so the much anticipated 'first ever' WW2 game has transpired.
Fortunately we have had a bit of practice using WW1 figs so we were able to get to grips fairly quickly without too much reference to the gorgeously illustrated main Rule Book, always a dangerous distraction with so much eye candy.
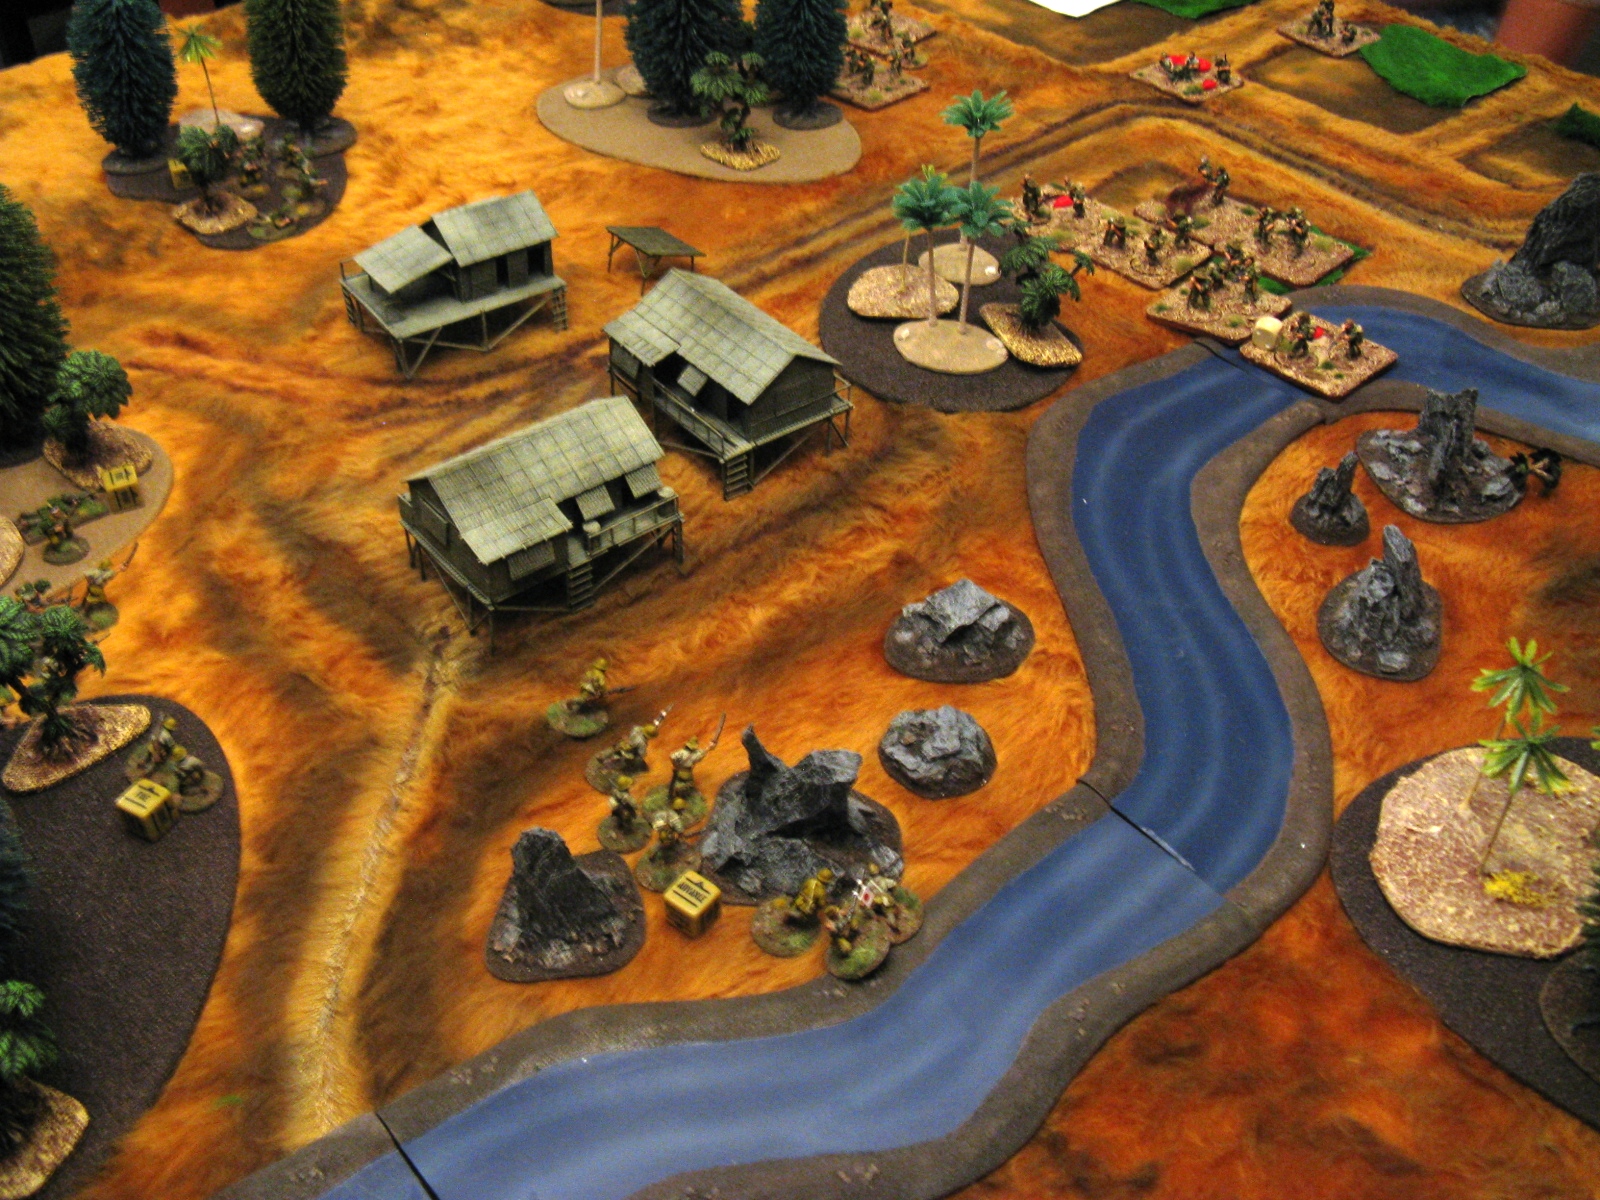
For the scenario we chose a 'Take the Objective' game which involved setting up the objective in the centre of the table with both sides deploying 8" from their baseline. The winner being the one holding the prize at the end. In this case a corrugated iron lean-to shelter containing much needed supplies of canned food located in the middle of a native village somewhere in the New Guinea Highlands.
We chose approx 700 point armies each and I opted for experience over numbers with my force of Japanese by designating them veteran.
Japanese Force comprises:
1 x HQ, 1x 2nd Lieutenant, 1 radio operator 1 attendant(Standard bearer)
1 x 7.7mm MMG 3 crew
1 light Mortar
1 sniper team
3 squads comprising 1 nco, 1 lmg team, 5 riflemen
Chindits
Dave, 'The Aussies', sacrificed experience for a large force of inexperienced troops, the exact composition I can't recall in detail but there seemed to be bucket loads of them, even to the extent of a flame thrower team, a mortar team, Vickers HMG team and the extravagance of a medic for each platoon thrown in.
The Battle
As usual I wont give a blow by blow account of every single move and selected highlights of the more thrilling dice rolls but instead will give a brief outline of how the game transpired accompanied by some pics and conclude with a summary.
Turn 1 commenced with the Aussies pulling dice after dice out of the dice bag so 3/4s of his force was deployed before a Jap dice was drawn. This suited me as I was able to deploy my troops to counter his deployments.
I positioned my MMG in a jungle grove with a fairly unrestricted field of fire to cover the village and approaches. Same for the light mortar and then my three squads evenly spread with one on each flank and one in the centre. My plan was to move into ambush on my Left flank in the jungle whilst my other two squads would advance through the village taking advantage of any cover.
Turn 2 and The Aussies chanced their luck with some long range fire from their HMG and mortar to no effect. But I deemed it prudent to get my lads heads down. I responded with a well aimed shot from my sniper team boring a neat hole through the temple of one of his HMG loaders.
An exchange of fire between my Right Flank squad who had deployed in the rocky ground around the river and the Chindits saw the Aussies loose 4 men to some withering fire.
On my left flank my squad had made the cover of the Jungle grove and settled into an ambush position on the fringe of the leafy canopy.
 |
| Jungle fighter sqaud in ambush |
Turn 3 the Aussies sent a force to outflank my ambush troops but came under fire from my HMG whilst in the open and took heavy casualties. My mortar got lucky and put paid to two more of his troops approaching the village whilst I continued to pick of his troops on the edge of the river forcing a morale test on him which he passed...just. His Bren team sprayed sporadic fire into the jungle in an attempt to winkle out my ambush squad with little effect other than to decimate some leaves and his flame-thrower team moved ominously closer to the village under cover of the jungle.
Turn 4 My troops by the river continued to pour well aimed fire into the poor Aussies with another two hits, this time his morale collapsed and his troops were in such a poor state with numerous pin markers that were unable to offer any effective fire in return and were removed.
The time had come for me to spring my ambush so I let fly at his outflanking force but disappointingly failed to score a single hit. Seizing their opportunity the Aussies charged me and two of my men went down in a hail of lead and grenade splinters however I fought back tenaciously and dealt to no less than four of his squad making me the winner of the melee so nothing more to worry about on that score. My centre squad had advanced rapidly through the village and taken up position in the most northern hut and let loose a volley on the Aussie flamethrower team scoring 4 hits and 4 kills so bye bye flame thrower. Even the tender mercies of his best medics could not save them.
Turn 5 Things were looking decidely shaky for the inexperienced Aussies at this point and sensing their state of near collapse 2nd Lieutenant Mashimoto decided to lend a hand to proceedings and moved up to the village to personally oversee affairs and lend moral support. The presence of such an esteemed hero of the Empire inspired my ambush troops to perform an impromptu Banzai charge on the unsuspecting Aussies in the adjacent jungle grove at the expense of two hits from incoming fire. This failed to halt their headlong charge and they sliced through the hapless Aussies inflicting no less than 4 kills on them and setting them to flight.
 |
| Banzai!! |
With the Japanese commanders hands on the grub and no hope of the Aussies launching a counter-attack we declared it an outright victory for the Honourable Sons of Nippon.
 |
| First dibs on the canned peaches |
To conclude:
Despite large numbers this turned out to be a tough ask for the Aussies as their inexperience seriously compromised their fighting ability, notwitstanding the fact that I was decidedly on-form with my dice throwing, experience counts and, as in real life, a small, highly trained force of veterans can easily outpunch a large force of green conscripts. Also the large number of medics turned out to be a total waste of points.
This is only our third Bolt Action game but so far we have found them a delight to play with and they have actually rekindled my interest in WW2. They just seem to play and feel right. Purists will no doubt dismiss them as too simplistic and one renowned hobby stalwart has made negative comments about the anti tank rules but frankly I dont care, they're fun and allow a totally enoyable game to be played to conclusion in two hours. There are lots of quite clever special rules that add flavour to the game such as Banzai charges, medics, snipers, etc and add national characteristics to your armies. There is nothing better than a grown man yelling Banzai! as his little lead men charge across the table Samurai sword waving and banners fluttering.
I'm hooked so watch out for more thrilling installments.
Finally the wonderful scenery and exquisitely painted Aussies are the handiwork of my good wargaming mate Dave Houston, you'll no doubt recognize the much loved Airfix Jungle outpost.